


Overflow's Campaign management tool with the Dashboard allows you to establish funds, locations, events, or anything else that you need to ensure donations are routed to the correct place. Note that any campaign or subcampaign that you create in the Dashboard will appear for all asset classes you have with Overflow.
Choose your own adventure - visual learner? We've got a guided walkthrough video for you! Prefer step-by-step instructions? Scroll down, my friend!
Video walkthrough
Step-by-step
Follow along below to learn how to:
- Create a campaign
- Create a subcampaign
- Edit and delete campaigns and subcampaigns
- Customize campaign settings
Create a Campaign
1. Within your Dashboard, navigate to the Campaigns tab.
2. Click "Create Campaign".
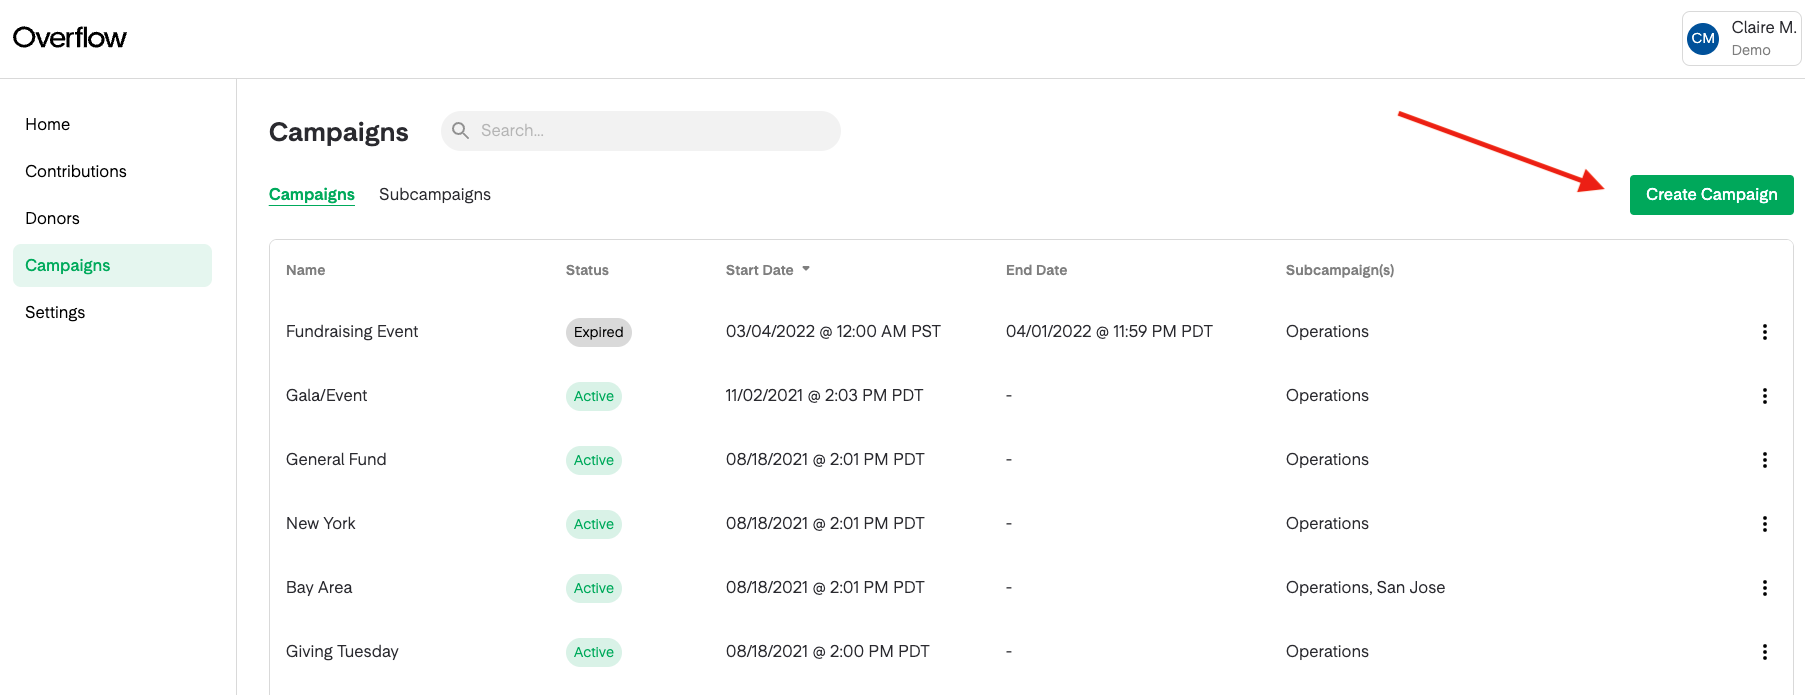
3. Enter campaign details. The name of the campaign you enter is what will display to donors. You can choose to either set the campaign live immediately or have it appear within the donor experience on a future date. You also can set an end date for the campaign, or leave it blank if this is a fund or designation you always want visible to donors.
Create a Subcampaign
1. Click the grey tab, "Subcampaigns" next to "Campaigns".

2. Click "Create Subcampaign".
3. Enter subcampaign details.
- NAME: Similar to campaigns, the name you set here will apply to all asset class donation experiences you have with Overflow.
- CHECKBOX: You can choose to apply this subcampaign to all future campaigns. For example, if you are a church with multiple locations but "Tithes & Offerings" is a fund that applies to every location, you may choose to set the campus at the Campaign, and "Tithes & Offerings" as a subcampaign that will apply to all campaigns you've created.
- PARENT CAMPAIGN: If you choose not to apply the subcampaign to all campaigns, you can select under which parent campaign it should appear.
- START DATE: Select the date (if it is different than today) that the subcampaign should be visible to donors. Note that if you select a start date that is before the parent campaign's start date, the subcampaign will not be appear within the donor experience until the parent campaign is live. If the subcampaign is set to start after the parent campaign, the parent campaign will appear independent of the subcampaign, and the subcampaign won't be visible until the date you set.
- END DATE: The date on which the subcampaign will expire and no longer be visible within the donor experience. Note that expired campaigns and subcampaigns will still appear within the contribution details on your Dashboard, but the donor will no longer see them as an option.
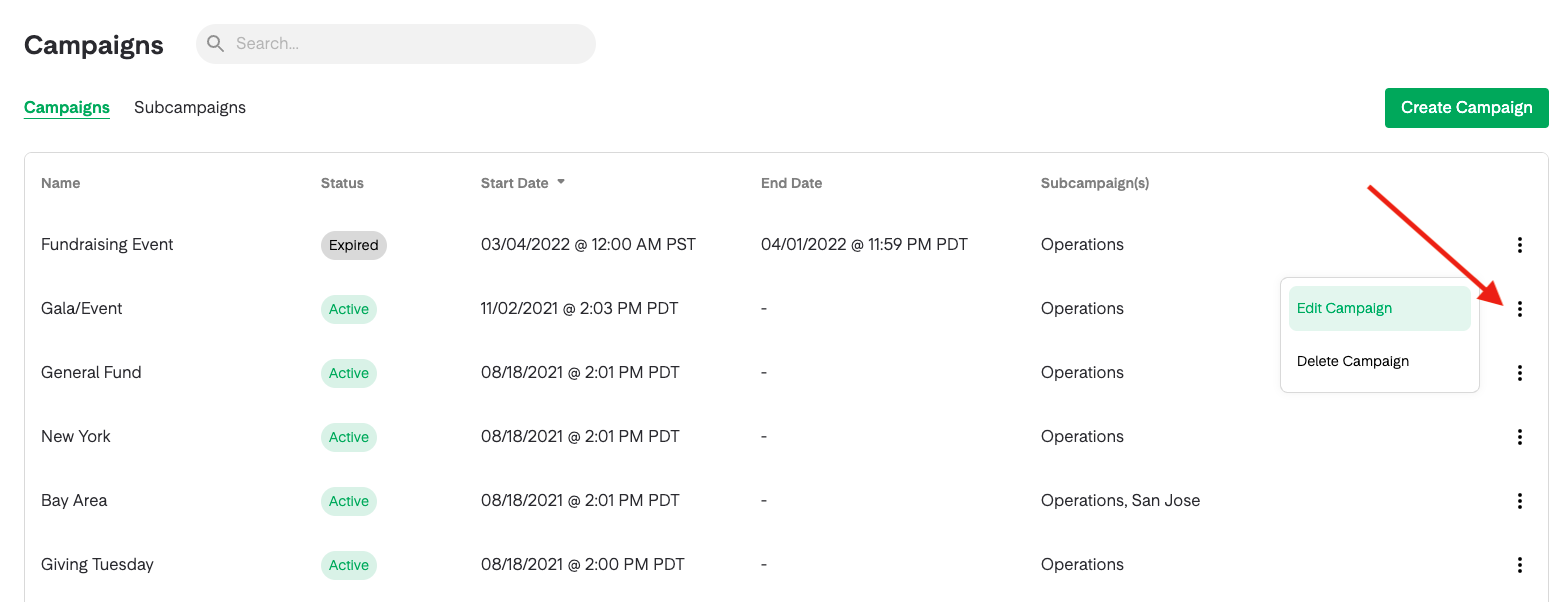
Edit or Delete a Campaign or Subcampaign
To make changes to or to remove a campaign or subcampaign, click the ellipsis to the far right.
Customize Campaign Settings
To change campaign and subcampaign settings, navigate to Settings, Customization tab. Here you can choose to make campaigns or subcampaigns required within the donor experience.
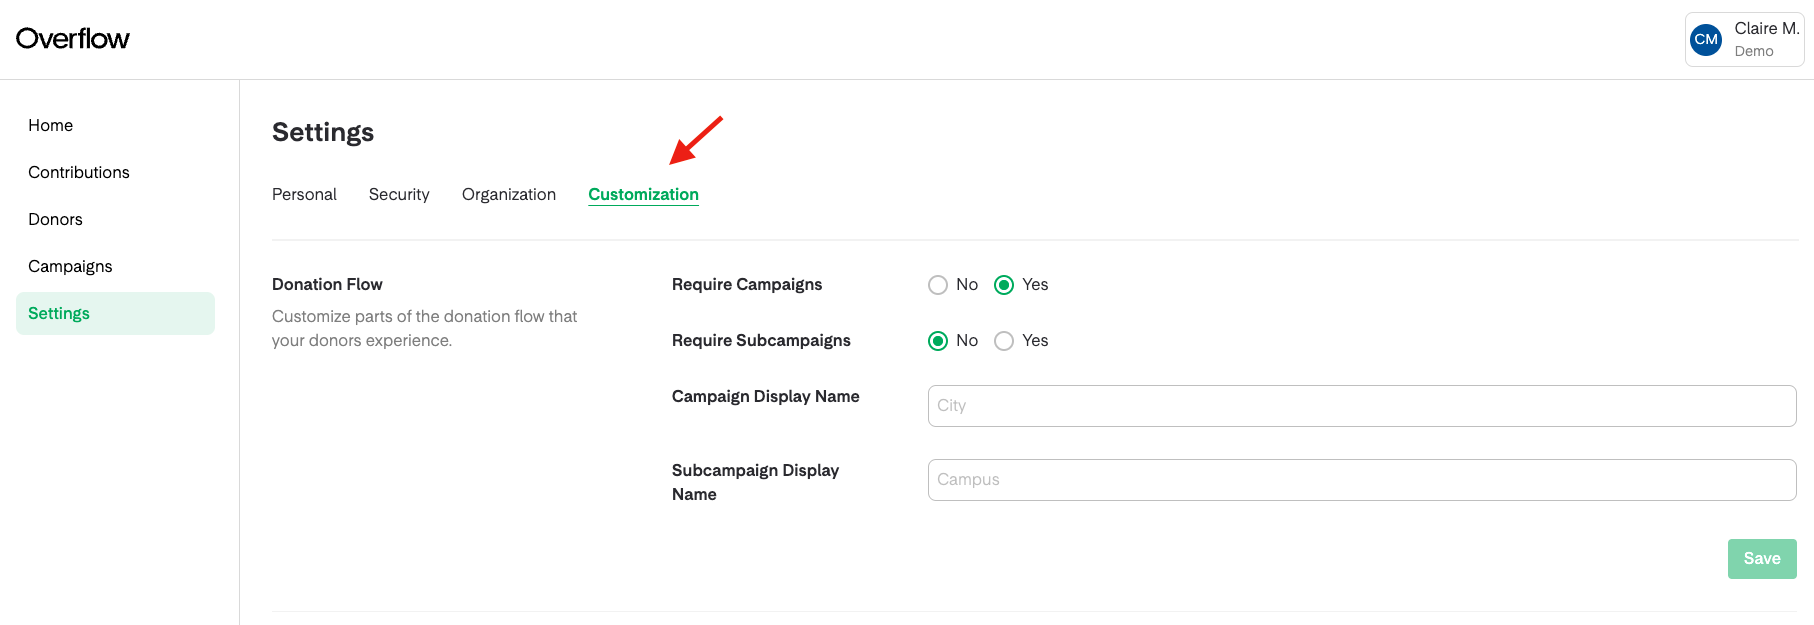
You also have the option to rename the label of Campaign and Subcampaign within the donor experience. You may choose to do this because your organization uses different terminology for campaigns and you want to keep the donor experience consistent. For example, maybe you refer to "Campaign" as Location because your organization operates within many different cities, and Subcampaign is "Fund" which designates where the donor would like the donation to go.
Simply make the changes you'd like and then click "Save".
Overflow is a revolutionary generosity partner
We make givng donations easier than buying a cup of coffee.

Share this article
Related Content


Sign up for our updates
Stay up to date on the latest innovations happening at Overflow.